5 Tips for Choosing the Best Kayak Stand: A Comprehensive Guide
Understanding the Importance of a Kayak Stand
Why You Need a Kayak Stand
As a passionate kayaker, I’ve learned firsthand the importance of investing in a reliable kayak stand. It’s not just about convenience; it’s about protecting your investment. A good kayak stand ensures that your kayak is stored properly, reducing the risk of damage and prolonging its lifespan.
Benefits of Using a Kayak Stand
There are several benefits to using a kayak stand over alternative storage methods like Kayak covers. Firstly, it keeps your kayak off the ground, preventing scratches, dents, and other damage that can occur from storing it directly on a hard surface. Secondly, it allows for proper drainage, ensuring that any water that gets into your kayak can easily drain away, reducing the risk of mold and mildew buildup. Additionally, a kayak stand keeps your kayak elevated and out of the way, freeing up valuable space in your garage or storage area.
Protect Your Investment
Your kayak is more than just a piece of equipment; it’s a valuable tool for exploring the great outdoors. By investing in a kayak stand, you’re taking proactive steps to protect that investment and ensure that your kayak remains in top condition for years to come.
Types of Kayak Stands
Freestanding Kayak Stands
Freestanding kayak stands are versatile and easy to use. Here’s how to set one up:
1. Unbox the Stand:
Start by unpacking the freestanding kayak stand and laying out all the components.
2. Assemble the Frame:
Follow the manufacturer’s instructions to assemble the frame of the stand. This typically involves connecting the different pieces together using screws or bolts.
3. Adjust for Stability:
Once the frame is assembled, adjust any adjustable feet or leveling mechanisms to ensure the stand is stable on the ground.
4. Place Your Kayak:
Carefully place your kayak onto the stand, ensuring it is centered and balanced.
5. Final Checks:
Double-check that the kayak is secure and stable on the stand. Make any necessary adjustments to ensure proper support.
Wall-Mounted Kayak Racks
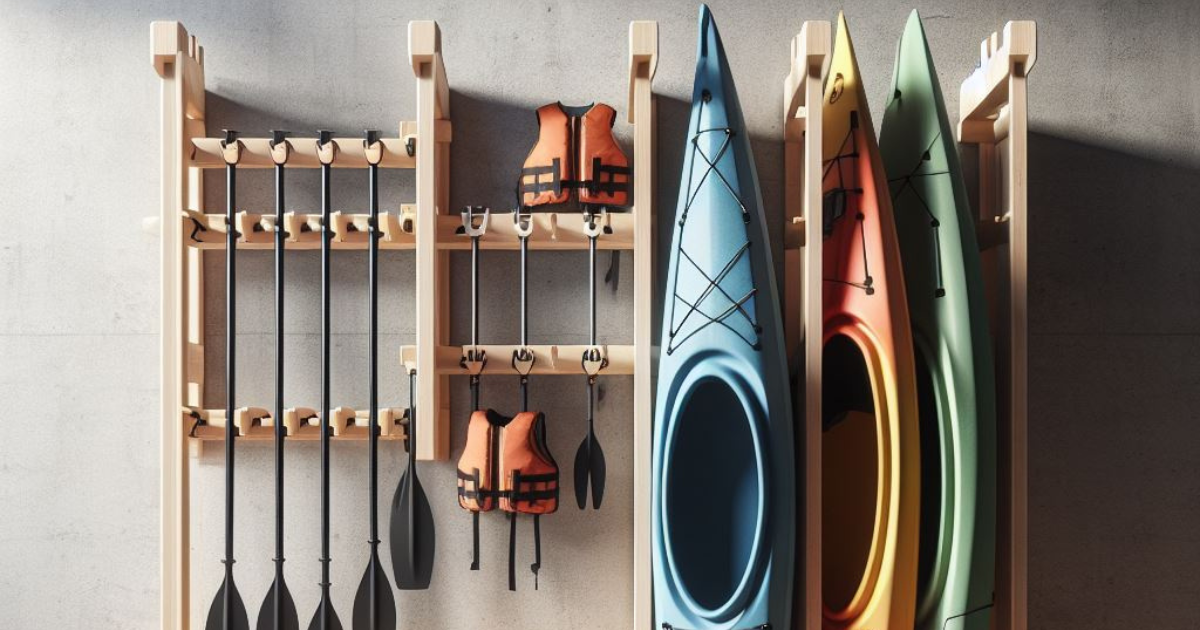
Wall-mounted kayak racks are great for saving space. Here’s how to install one:
1. Choose a Location:
Select a sturdy wall in your garage or storage area where you want to install the kayak rack.
2. Mark the Mounting Points:
Use a pencil to mark the mounting points for the rack brackets on the wall. Make sure they are evenly spaced and aligned.
3. Drill Holes:
Use a drill to create pilot holes for the mounting screws at each marked point on the wall.
4. Attach the Brackets:
Securely attach the rack brackets to the wall using the mounting screws and a screwdriver or drill.
5. Install the Arms:
Attach the arms of the kayak rack to the brackets, ensuring they are securely fastened.
6. Test for Stability:
Once the rack is fully installed, carefully place your kayak onto the arms and ensure that it is stable and secure.
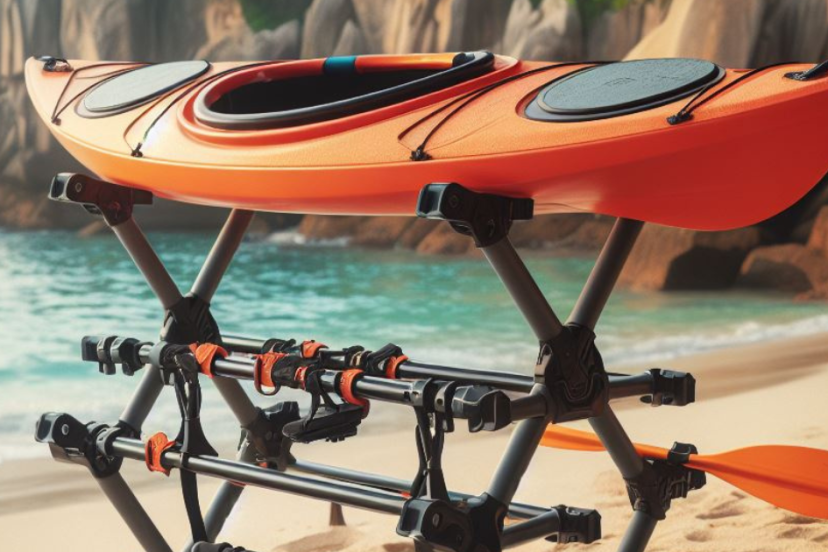
Portable Kayak Stands
Portable kayak stands are ideal for on-the-go paddlers. Here’s how to use one:
1. Unfold the Stand:
Start by unfolding the portable kayak stand and extending any adjustable legs or supports.
2. Position the Stand:
Place the stand on a flat, stable surface, ensuring it is level and secure.
3. Adjust for Size:
If the stand has adjustable features, adjust them to fit the dimensions of your kayak.
4. Place Your Kayak:
Carefully place your kayak onto the stand, making sure it is centered and balanced.
5. Secure if Necessary:
If the stand has straps or other securing mechanisms, use them to secure your kayak in place.
Ceiling-Mounted Kayak Hoists
Ceiling-mounted kayak hoists are great for maximizing overhead space. Here’s how to install one:
1. Locate Ceiling Joists:
Use a stud finder to locate the ceiling joists in your garage or storage area where you want to install the hoist.
2. Mark Mounting Points:
Mark the mounting points for the hoist brackets on the ceiling joists, ensuring they are evenly spaced and aligned.
3. Drill Pilot Holes:
Use a drill to create pilot holes for the mounting screws at each marked point on the ceiling joists.
4. Attach the Brackets:
Securely attach the hoist brackets to the ceiling joists using the mounting screws and a screwdriver or drill.
5. Install the Pulley System:
Attach the pulley system to the brackets according to the manufacturer’s instructions, ensuring it is securely fastened.
6. Test the Hoist:
Once the hoist is fully installed, test it by lifting and lowering your kayak to ensure smooth operation and stability.
DIY Kayak Stands
DIY kayak stands are customizable and budget-friendly. Here’s how to build one:
1. Gather Materials:
Collect the necessary materials for your DIY kayak stand, such as PVC pipes, wooden planks, or metal rods.
2. Design the Stand:
Plan out the design and dimensions of your kayak stand based on the size and weight of your kayak.
3. Cut and Assemble:
Cut the materials to size according to your design and assemble them using appropriate fasteners or adhesive.
4. Test for Stability:
Once the stand is assembled, test it by placing your kayak on top and ensuring it is stable and secure.
5. Make Adjustments:
Make any necessary adjustments to the stand to ensure proper support and stability for your kayak.
5 Factors to Consider When Choosing a Kayak Stand
1. Material: Durability and Resistance to Weather Conditions
Pros:
– Longevity:
High-quality materials like stainless steel and aluminum ensure that the stand lasts for years, even when exposed to harsh weather conditions.
– Protection:
Weather-resistant materials prevent rust and corrosion, keeping your kayak stand looking and functioning like new.
– Reliability:
Durable materials provide a stable and secure base for your kayak, minimizing the risk of damage or accidents.
– Low Maintenance:
Resilient materials require minimal upkeep, saving you time and effort in the long run.
– Value: Investing in a durable kayak stand made of quality materials offers excellent value for money, as it reduces the need for frequent replacements.
Cons:
– Cost:
Higher-quality materials often come with a higher price tag, which may be a consideration for budget-conscious buyers.
– Weight:
Some durable materials, like stainless steel, can be heavy, making the stand less portable and harder to move around.
2. Weight Capacity: Ensuring Compatibility with Your Kayak
Pros:
– Protection:
Choosing a stand with a weight capacity that matches your kayak prevents overloading, reducing the risk of damage or distortion.
– Stability:
Proper weight distribution ensures that the stand remains stable and upright, even when your kayak is fully loaded with gear.
– Versatility:
A stand with a higher weight capacity can accommodate a wider range of kayaks, providing flexibility for future upgrades or changes.
– Peace of Mind:
Knowing that your kayak stand can support the weight of your kayak and equipment gives you confidence in its reliability and safety.
– Longevity:
Avoiding overloading helps prolong the lifespan of the stand, ensuring that it remains sturdy and functional for years to come.
Cons:
– Bulkiness:
Stands with higher weight capacities may be larger and bulkier, requiring more storage space when not in use.
– Cost:
Stands with higher weight capacities may come with a higher price tag, which may not be feasible for all budgets.
3. Stability: Preventing Accidental Tipping or Damage
Pros:
– Safety:
A stable stand reduces the risk of tipping over, preventing accidents and potential damage to your kayak.
– Security:
Sturdy construction and a solid base provide peace of mind, knowing that your kayak is securely supported.
– Ease of Use:
A stable stand makes it easier to load and unload your kayak, as it remains steady and upright during the process.
– Protection:
Preventing accidental tipping minimizes the risk of scratches, dents, or other damage to your kayak, preserving its appearance and performance.
– Durability:
Stands with excellent stability are less likely to wear out or become damaged over time, ensuring long-term reliability and functionality.
Cons:
– Bulkiness:
Stands designed for maximum stability may be larger and heavier, making them less portable and more challenging to move around.
– Cost:
Stands with advanced stability features may come with a higher price tag, which may not be feasible for all budgets.
4. Portability: Ease of Transport and Storage
Pros:
– Convenience:
Lightweight and portable stands are easy to transport, allowing you to take them with you on kayaking trips or store them in different locations.
– Flexibility:
Portable stands can be used in various settings, from your garage to a campsite or boat launch, providing versatility for outdoor enthusiasts.
– Space Saving:
Collapsible or foldable designs minimize storage space when the stand is not in use, making them ideal for homes with limited storage space.
– Accessibility:
Being able to transport your kayak stand easily means you can take better care of your kayak, whether you’re at home or on the go.
– Adaptability:
Portable stands can be adjusted or repositioned as needed, allowing you to find the most suitable storage solution for your kayak in any environment.
Cons:
– Stability:
Portable stands may sacrifice some stability for convenience, which could be a concern in windy or high-traffic areas.
– Durability:
Lightweight materials used in portable stands may be less durable than heavier materials, potentially affecting the stand’s long-term reliability.
5. Compatibility: Matching the Stand to Your Kayak Type
Pros:
– Optimal Fit:
Choosing a stand specifically designed for your kayak type ensures a perfect fit, maximizing stability and support.
– Enhanced Functionality:
Compatible stands may come with additional features or adjustments tailored to your kayak’s design, providing added convenience and versatility.
– Preventive Maintenance:
Using a stand that matches your kayak’s dimensions and shape helps prevent distortion or damage over time, prolonging its lifespan.
– Efficiency:
Compatible stands are designed to work seamlessly with your kayak, making loading and unloading easier and more efficient.
– Peace of Mind:
Knowing that your kayak is securely supported by a stand designed specifically for its type gives you confidence in its stability and safety.
Cons:
– Limited Options:
Finding a stand that matches less common or specialized kayak types may be challenging, limiting your choices.
– Cost: Stands designed for specific kayak types may come with a higher price tag compared to generic or universal stands.
My Personal Favorites and Reviews
YakAttack Deluxe Rigging Stand: A Must-Have for Kayak Enthusiasts
Why I Love It:
As an avid kayaker, the YakAttack Deluxe Rigging Stand has become an essential part of my gear collection. Its versatility is unmatched, making it suitable for all types of kayaks, whether I’m out for a leisurely paddle or a day of fishing. The durable construction gives me peace of mind, knowing that my kayak is securely supported, while the adjustable features ensure a perfect fit every time.
Pros:
– Versatile design accommodates all kayak types.
– Durable construction ensures long-lasting performance.
– Adjustable features provide a customized fit.
– Compact design for easy storage.
– User-friendly assembly and use.
Cons:
– Higher price tag compared to some other options.
– May take up significant space when fully assembled.
Suspenz EZ Kayak Rack: Space-Saving Storage Solution
Why It’s a Winner:
The Suspenz EZ Kayak Rack has revolutionized the way I store my kayak. Its wall-mounted design frees up valuable floor space in my garage, allowing me to maximize storage efficiency. Installation was a breeze, and the sturdy construction gives me confidence that my kayak is safe and secure. Plus, the adjustable arms ensure a perfect fit for my kayak every time.
Pros:
– Space-saving wall-mounted design.
– Sturdy construction provides stability and support.
– Easy installation with basic tools.
– Adjustable arms accommodate different kayak sizes.
– Protective padding prevents scratches and damage.
Cons:
– Requires a sturdy wall for installation.
– Not as easily movable as freestanding options.
RAD Sportz Kayak Hoist: Convenient Overhead Storage Solution
Why It’s a Game-Changer:
The RAD Sportz Kayak Hoist has transformed how I store my kayak in the garage. Its pulley system makes it easy to lift and lower my kayak, maximizing overhead storage space. The adjustable straps ensure a secure fit, and the durable construction gives me peace of mind that my kayak is safe and protected. Plus, the safety features provide added reassurance when storing my kayak overhead.
Pros:
– Maximizes overhead storage space.
– Convenient pulley system for easy lifting and lowering.
– Adjustable straps accommodate different kayak sizes and weights.
– Durable construction ensures stability and support.
– Safety features prevent accidental release.
Cons:
– Requires sufficient ceiling height for installation.
– Installation may require assistance and careful placement.
Conclusion
Making the Right Choice for Your Kayak Stand
Choosing the perfect kayak stand is essential for ensuring the safety and longevity of your kayak. After exploring various factors such as material, weight capacity, stability, portability, compatibility, and personal preferences, you’re now equipped with the knowledge to make an informed decision.
Invest in Quality for Peace of Mind
Whether you opt for the versatile YakAttack Deluxe Rigging Stand, the space-saving Suspenz EZ Kayak Rack, or the convenient RAD Sportz Kayak Hoist, prioritize quality and reliability. Investing in a high-quality kayak stand may require a bit more upfront, but it pays off in the long run with peace of mind knowing that your kayak is securely stored and protected.
Tailor Your Choice to Your Needs
Consider your specific needs and circumstances when selecting a kayak stand. If space is limited, a wall-mounted rack may be the best option. For on-the-go adventurers, a portable stand offers convenience. Whatever your preferences, choose a stand that meets your requirements and enhances your kayaking experience.
Happy Paddling!
With the right kayak stand, you can confidently store your kayak and focus on enjoying your paddling adventures to the fullest. Remember to prioritize safety, durability, and convenience when making your choice. Here’s to many more exciting kayaking journeys ahead!
FAQs
1. How do I determine the weight capacity of a kayak stand?
To determine the weight capacity of a kayak stand, check the manufacturer’s specifications. Look for information on the maximum weight the stand can support. Consider the weight of your kayak, including any gear or accessories, and choose a stand that can accommodate that weight without overloading.
2. Can I use a kayak stand for other watercraft, such as paddleboards?
While kayak stands are specifically designed for kayaks, some may be versatile enough to accommodate other watercraft like paddleboards. However, it’s essential to check the stand’s specifications and ensure compatibility with the dimensions and weight of your paddleboard before use.
3. Are wall-mounted kayak racks suitable for outdoor use?
Wall-mounted kayak racks can be suitable for outdoor use, depending on their construction and materials. Look for racks made from weather-resistant materials like stainless steel or aluminum, and ensure they are installed securely to withstand outdoor elements such as rain, wind, and sun exposure.
4. What maintenance is required for a kayak stand?
The maintenance required for a kayak stand depends on its materials and design. Generally, keep the stand clean and free of debris to prevent damage to your kayak’s hull. If the stand has moving parts, lubricate them periodically to ensure smooth operation. Check for any signs of wear or damage and address them promptly to maintain the stand’s functionality and longevity.
5. Can I assemble a freestanding kayak stand by myself?
Yes, you can typically assemble a freestanding kayak stand by yourself, as long as you follow the manufacturer’s instructions carefully. Most stands come with detailed assembly instructions and all the necessary hardware for assembly. However, if you’re unsure or uncomfortable with assembling it yourself, consider seeking assistance from a friend or hiring a professional for help.
*We may earn a commission from purchases made through our links, at no cost to you. This does not affect our product recommendations. Please see our disclosure to learn more.